
Some types of paper jams can be quickly and easily fixed without calling a technician. This article tells how to repair many types of paper jamming in laser printers and copiers.
When a copier or laser printer's control panel declares, "paper jam" and there's not a single piece of paper anywhere in the printer, you're left wondering where's the paper jam. After the machine commands a piece of paper to be sent from the paper tray it expects the paper to arrive at a sensor within a specific time. If the paper doesn't arrive, the machine assumes it got jammed somewhere along the paper path, and it announces "paper jam."
If you frequently have "paper jam" messages without any paper in the paper path, you've probably got a worn out or dirty pickup roller. The location of the pickup roller is usually directly above the paper tray, in the middle. Grab a flashlight and take a look at it. Feel it to see if there's any texture left on it or if it's all smooth and worn feeling. Try cleaning it first, with a slightly damp cloth, but don't leave it wet.
If cleaning doesn't help, replacement pickup rollers are usually easy to install (there are some exceptions) and are inexpensive.
Most HP LaserJets display the error code 13 for paper jams. In newer printers this is expanded to 13.0 or 13.1 or 13.2. The number after the decimal point refers to which sensor detected the jam. It starts with 0 at the paper pickup area, so a 13.0 message means the paper never arrived at the first sensor. The rest of the numbers are helpful if you know how many sensors your printer has and where they are. Printers usually have three or four sensors in their paper path, with the last one at paper exit, or at the fuser if there's a straight path from the fuser to the exit. There's usually one at every bend in the paper path.
If you get a paper jam at the same location every time you try to print, you've either got some sort of obstruction or you've got a bad sensor. Field technicians have a saying, "the leading edge points to the problem." This means where the first edge of the first piece of paper stops is the area where the problem is located. The problem is either a bad sensor or some physical blockage of the paper path.
Older sensors are usually "flags," pieces of plastic which get pushed down by the passing paper. Flags are designed to pivot and have springs. These can fail in many ways, but it's not uncommon for a flag to just get stuck and it may need only gentle manipulation.
The other type of sensor is optical - the paper breaks a light beam. These sensors can be very small and very difficult to locate. Other than cleaning them, there's not much you can do with an optical sensor. Time to call a tech.
Source: http://goo.gl/wVko1

It is easy to forget about your printer as you go about your computing needs. It sits there on your right hand side and springs to life when needed. Or at least it is supposed to. If you do not take a minute or two, a couple of time per week, you may find some interesting words coming out of your mouth when streaks or paper jams occur.
Keep it clean
This is easily said and done. The printer heads are the biggie in this area. Printer heads are definitely prone to clogging. If they are not used on a regular basis, or if they are used at a quick clip, they will clog. Every now and again take out the printer cartridges and give a quick clean with a non-linting cloth or moistened Q-tip. If you do use your printer quite a bit think about all those pieces of paper rolling through the printer. It is unlikely that each and every piece of paper will roll through without a shard or tear coming off the paper. These shards will attach themselves to the rollers or other inconvenient printer elements. It is wise to open up the printer every now and again and give it a quick wipe down with a moistened Q-tip.
Turn off and cover
It may seem like many of these tips involve the printer heads, and they do. The printer heads are the area where most preventable maintenance issues occur. Most people, me included, are prone to turning off the computer but not the printer. This leaves the printer heads exposed to the air and possibly drying out. At the ends of the day turn off the printer at the printer. Not from the power cord but at the printer. This will cover the printer heads. Particularly if you are in a dusty region, or if you have a pet, cover you printer. Dust and hair are killers for a printer.
Use the printer
One of the biggest ways to take care of your printer is to use it. Many people really do not use the printer all that much, myself included. This is a digital age and everything tends to stay on the computer. At least twice a week print something that will use all the printers' workings. A colorful website will do but give it a bit of a workout and most of the other maintenance issues will never arise.
Source: http://goo.gl/ZDvf4
Keep it clean
This is easily said and done. The printer heads are the biggie in this area. Printer heads are definitely prone to clogging. If they are not used on a regular basis, or if they are used at a quick clip, they will clog. Every now and again take out the printer cartridges and give a quick clean with a non-linting cloth or moistened Q-tip. If you do use your printer quite a bit think about all those pieces of paper rolling through the printer. It is unlikely that each and every piece of paper will roll through without a shard or tear coming off the paper. These shards will attach themselves to the rollers or other inconvenient printer elements. It is wise to open up the printer every now and again and give it a quick wipe down with a moistened Q-tip.
Turn off and cover
It may seem like many of these tips involve the printer heads, and they do. The printer heads are the area where most preventable maintenance issues occur. Most people, me included, are prone to turning off the computer but not the printer. This leaves the printer heads exposed to the air and possibly drying out. At the ends of the day turn off the printer at the printer. Not from the power cord but at the printer. This will cover the printer heads. Particularly if you are in a dusty region, or if you have a pet, cover you printer. Dust and hair are killers for a printer.
Use the printer
One of the biggest ways to take care of your printer is to use it. Many people really do not use the printer all that much, myself included. This is a digital age and everything tends to stay on the computer. At least twice a week print something that will use all the printers' workings. A colorful website will do but give it a bit of a workout and most of the other maintenance issues will never arise.
Source: http://goo.gl/ZDvf4
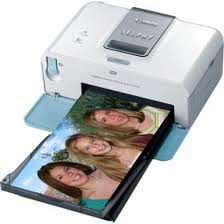
Printer is a good companion if it works nicely, but a worse foe when it stops giving the desired results. Here are some of the tips that you can follow to fix your Canon printer and get the best out of it.
General Issues
Paper jam: It’s a frequent mishap when more than one sheet of paper stuck together in the feeding mechanism. You can manually lift the cover and remove it.
Ink level: Your cartridge has no ink and you may be getting no print except a blank paper.
Clogged cartridges: This is the most common fault, when your cartridge head is clogged with dry ink. You can repair it with simple command as: Control Panel> Printer>Right Click> Properties>Maintenance> Clean Cartridges.
Driver failure: Software bugs, errors or conflicts may arise on account of corrupted printer’s software and hardware. You need to reinstall printer drivers and software. Try to get best compatible driver for installation.
Alternatively, you can update your printer driver as: "Control Panel > Printers > Right Click > Properties > Update Driver".
Canon-Specific Issues
Waste Ink Error: Here you need to take some setting steps. Press menu option of your printer followed by scan/copy to access Service more option. Now, press the right arrow to explore "NVRAM". Set ABS-M level to 0. Set ABS-P level to 0. Press "Stop" to exit.
Invalid Cartridge Message: Turn off your printer besides unplugging the power cable. Recover the cartridges and the print head and dip them in lukewarm water to remove clotted ink. Allow them to dry and wipe with a tissue. Now, reset them in your printer and run the cartridge alignment.
E0D02 error: Ensure your cartridge as well as the attached sender strip is free from moisture and dust. The sender strip is located behind the rubber drive belt and runs horizontally across the machine. Make a regular practice to wipe it with a soft cloth.
Learn some printer etiquette's to avoid above issues:
Keep patience: Don’t give print commands for multiple jobs at a single time, as the printer take the time as per the size of the print job requested earlier.
Use desired paper: Abstain from printing on card stock, photo paper, etc; use only laser jet paper.
Restrict print jobs beyond 50 pages: Don’t over burden your printer. It is advised to print not more than 50 pages in one single go. Avoid too much color ink: Black and white laser printers are the best as they need the least maintenance.
sources: http://goo.gl/Vfct6
Problem :
I can't share my Epson or HP printer on my new custom built pc with windows 7. I've uninstalled the software reinstalled it with updated drivers for windows 7, I've turned off the virus protection and firewall and it continues to give me the following error 0x000006cc. Any ideas on how to fix this. We also have an Acer computer with Windows 7 and it has no problems sharing the printer, it doesn't give me this error.
Solution :
There is a Knowledge Base : How to configure RPC dynamic port allocation to work with firewalls
http://support.microsoft.com/default.aspx?scid=kb;EN-US;154596
check if this registy key is set (this is not the default configuration). It's not a spooler registry key. Someone stated that if this key is set, RPC will return an error to the spooler on statup. HKEY_LOCAL_MACHINE\Software\Microsoft\Rpc\Internet\. I have no idea which application sets or uses this setting.
I can't share my Epson or HP printer on my new custom built pc with windows 7. I've uninstalled the software reinstalled it with updated drivers for windows 7, I've turned off the virus protection and firewall and it continues to give me the following error 0x000006cc. Any ideas on how to fix this. We also have an Acer computer with Windows 7 and it has no problems sharing the printer, it doesn't give me this error.
Solution :
There is a Knowledge Base : How to configure RPC dynamic port allocation to work with firewalls
http://support.microsoft.com/default.aspx?scid=kb;EN-US;154596
check if this registy key is set (this is not the default configuration). It's not a spooler registry key. Someone stated that if this key is set, RPC will return an error to the spooler on statup. HKEY_LOCAL_MACHINE\Software\Microsoft\Rpc\Internet\. I have no idea which application sets or uses this setting.
Problem :
I bought a compatible Dell printer cartridge and it was working fine and now it gives me an error message of 1203. Can anyone tell me what that means? And, what I need to do?
Solution :
I found if you cover a copper contact on the color cartridge the erroe clears and the cartridge works. looking from the contact side for the color cartridhe 2nd row contact 2 from the left. I found if I use an ohm meter from 2nd to 3rd contact I measure 119 ohms. I believe that is a shorted cartridge. If you bought it New I would get it replaced. I use a SMALL square piece of Scotch tape.
I bought a compatible Dell printer cartridge and it was working fine and now it gives me an error message of 1203. Can anyone tell me what that means? And, what I need to do?
Solution :
I found if you cover a copper contact on the color cartridge the erroe clears and the cartridge works. looking from the contact side for the color cartridhe 2nd row contact 2 from the left. I found if I use an ohm meter from 2nd to 3rd contact I measure 119 ohms. I believe that is a shorted cartridge. If you bought it New I would get it replaced. I use a SMALL square piece of Scotch tape.
Problem :
HP Wireless Printer Offline
I recently purchased an HP Laserjet Pro CP 1025nw wireless printer. If I turn off the printer it is offline when I turn it back on. I left it on all night and it was offline this morning. The only way to resurrect it is to uninstall and install the program. When I attempt to download solutions, all I get is to uninstall the program - back to square one. Has anyone else encountered this problem and discovered a fix?
Solution :
Let's set a static IP address for the printer:
- Print a Network Config Page from the front of the printer. Note the printer's IP address.
- Type that IP address into a browser to reveal the printer's internal settings.
- Choose the Networking tab, then Wireless along the left side, then the IPv4 tab.
- On this screen you want to set a Manual IP. You need to set an IP address outside the range that the router automatically sets (called the DHCP range). You can change the DHCP range of the router using its internal settings page.
- Use 255.255.255.0 for the subnet (unless you know it is different, if so, use that)
- Enter your router's IP (on the Network Config Page) for the gateway and first DNS. Leave the second one blank.
- Click 'Apply'.
HP Wireless Printer Offline
I recently purchased an HP Laserjet Pro CP 1025nw wireless printer. If I turn off the printer it is offline when I turn it back on. I left it on all night and it was offline this morning. The only way to resurrect it is to uninstall and install the program. When I attempt to download solutions, all I get is to uninstall the program - back to square one. Has anyone else encountered this problem and discovered a fix?
Solution :
Let's set a static IP address for the printer:
- Print a Network Config Page from the front of the printer. Note the printer's IP address.
- Type that IP address into a browser to reveal the printer's internal settings.
- Choose the Networking tab, then Wireless along the left side, then the IPv4 tab.
- On this screen you want to set a Manual IP. You need to set an IP address outside the range that the router automatically sets (called the DHCP range). You can change the DHCP range of the router using its internal settings page.
- Use 255.255.255.0 for the subnet (unless you know it is different, if so, use that)
- Enter your router's IP (on the Network Config Page) for the gateway and first DNS. Leave the second one blank.
- Click 'Apply'.
Problem :
I have an error code on my Brother printer model DCP-540CN the LDC display reads unable to clean 46 just wondering if anyone has heard or seen this before and how to fix it. In the user PDF it talks about the absorber pad being full is this easy to change and how do I go about it.
Solution :
The machine counts all purge (cleaning) operations in order to prevent the internal ink absorber box from overflowing with purged ink. An “initial purge”, for example, advances the purge counter by 187 + 420 = 607. When the purge counter approaches 6400, an internal "Machine Error 46" is generated. Further purge operations are prohibited, and therefore the printer becomes unuseable.
When an internal Machine Error 46 is generated, the user will see an “Unable to Clean” external message and will be unable to use the printer. The “Unable to Clean” external message can relate to many different internal error codes however.
The user can establish the internal Machine Error Code as follows: pull the mains cable out of the machine (power off), hold down the Menu/Set key, re-insert the mains cable into the machine (power on). The internal Machine Error Code will be displayed.
If there is a Machine Error 46, it is necessary to dismantle the printer, replace the ink absorber box (or possibly break the ink absorber box open and clean its absorbent sponges under a tap), re-assemble the printer and reset the purge counter to zero.
Resetting purge counter MFC620CN/420CN/410CN/210C and FAX2440C
1) Enter machine maintenance mode (on MFC210C all four photo/copy/fax/scan lights flash in maintenance mode). Care is needed in maintenance mode, otherwise critical settings may be inadvertently corrupted.
FAX models with numerical keypads: Press the Menu/Set, *, 2, 8, 6 and 4 keys within two seconds. (if you fail to complete the correct key sequence within two seconds, press the Stop key to try again).
Other (non-FAX) models: Press the Menu/Set and Black Start keys. Next press the “up arrow” key four times to enter the maintenance mode).
2) Press the 8 then 0 keys in the initial stage of the maintenance mode to call up the machine's log information list (function code 80).
3) Press the Black Start key several times to scroll through the log information list to reach the purge counter. The purge counter is the 25th item in the list.
4) Press the 2, 7, 8, and 3 keys in this order to reset the purge count to zero.
5) Press the Stop/Exit key to return to the initial stage of the maintenance mode.
6) Press the 9 key twice to return to the standby state.
I have an error code on my Brother printer model DCP-540CN the LDC display reads unable to clean 46 just wondering if anyone has heard or seen this before and how to fix it. In the user PDF it talks about the absorber pad being full is this easy to change and how do I go about it.
Solution :
The machine counts all purge (cleaning) operations in order to prevent the internal ink absorber box from overflowing with purged ink. An “initial purge”, for example, advances the purge counter by 187 + 420 = 607. When the purge counter approaches 6400, an internal "Machine Error 46" is generated. Further purge operations are prohibited, and therefore the printer becomes unuseable.
When an internal Machine Error 46 is generated, the user will see an “Unable to Clean” external message and will be unable to use the printer. The “Unable to Clean” external message can relate to many different internal error codes however.
The user can establish the internal Machine Error Code as follows: pull the mains cable out of the machine (power off), hold down the Menu/Set key, re-insert the mains cable into the machine (power on). The internal Machine Error Code will be displayed.
If there is a Machine Error 46, it is necessary to dismantle the printer, replace the ink absorber box (or possibly break the ink absorber box open and clean its absorbent sponges under a tap), re-assemble the printer and reset the purge counter to zero.
Resetting purge counter MFC620CN/420CN/410CN/210C and FAX2440C
1) Enter machine maintenance mode (on MFC210C all four photo/copy/fax/scan lights flash in maintenance mode). Care is needed in maintenance mode, otherwise critical settings may be inadvertently corrupted.
FAX models with numerical keypads: Press the Menu/Set, *, 2, 8, 6 and 4 keys within two seconds. (if you fail to complete the correct key sequence within two seconds, press the Stop key to try again).
Other (non-FAX) models: Press the Menu/Set and Black Start keys. Next press the “up arrow” key four times to enter the maintenance mode).
2) Press the 8 then 0 keys in the initial stage of the maintenance mode to call up the machine's log information list (function code 80).
3) Press the Black Start key several times to scroll through the log information list to reach the purge counter. The purge counter is the 25th item in the list.
4) Press the 2, 7, 8, and 3 keys in this order to reset the purge count to zero.
5) Press the Stop/Exit key to return to the initial stage of the maintenance mode.
6) Press the 9 key twice to return to the standby state.
Subscribe to:
Posts (Atom)